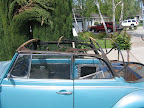
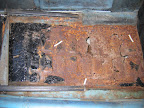
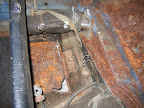
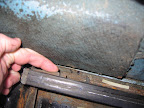
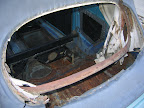
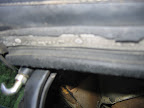
Taking the top off ended up being pretty easy, although it was probably a bit tougher than normal because one of the hinges was rusted tight and I wasn't able to fold the top back more than a couple of inches. The trickiest part was just figuring out how to start - take the vinyl off first? the headliner first?
I started by taking these little screws out but quickly found that they were just holding on the rubber strip.
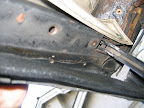
I started to 'rip' away layers at the front of the top. I could have unbolted the wooden structural bar, but that would have made too much sense!
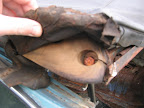
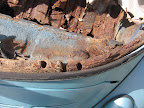
My biggest worry was that the top structure would be as rusted as the floor. Fortunately, that wasn't true? There's a little bit of rust, but nothing that can't be repaired with the welder - definitely cheaper than a new frame! The other expensive piece is that wooden bar bolted to the front of the frame, this was in perfect shape so that will definitely save a few hundred bucks.
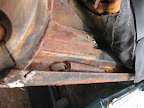
The layers start peeling away...
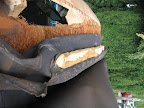
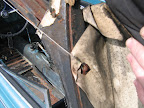
Peeled back to the first crossbar, here's how the headliner attaches:
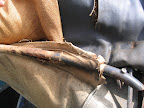
This looks like a huge mess, but the top pretty much peeled away with a little muscle, a razor, and a lot of aged-plastic.
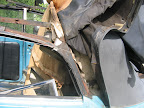
This cable goes taught when the top is 'up', but I didn't have to mess with this until later.
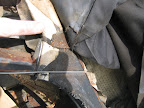
An in-progress shot.
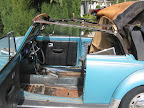
Looking at this, it's hard to believe the top looked ok from the outside, but clearly the water which had rusted out the firewall had done some serious damage to the vinyl as well. The wooden bar attached to the back body frame was falling apart. I hit it a few times with a hammer and it pretty much just fell out. The screws holding it in have bolts in the engine compartment. Unfortunately, they all appear to be pretty rusted and I wasn't able to remove any of them. I'll have to figure that out before it's time for a new top...
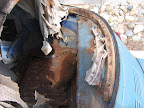
Almost done...
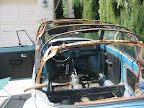
The strings attached to the very back bar worried me a bit, but they are just there to pull that bar taught when the top is 'up'. They are just tacked in.
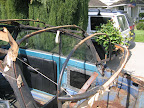
With the vinyl and headliner completely removed, it turned out to be really simple to take the frame itself off. Just take these bolts off on each side and lift away...
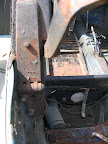
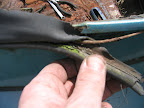
Notice the cable/bolt that's attached right before it. This cable needs to be completely removed in order to get the very last piece of vinyl off the car. This fabric is held in with the cable under a lip around the back of the car. This lip is pretty rusted and crumbled on the edges - that's going to be a fun one to fix...
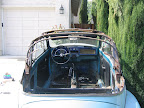
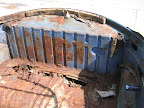
Here's the back of the car, with the top off.
Monday, April 7, 2008
Friday, April 4, 2008
Starting on the top
Since my car cover arrived a few days back, I've been wanting to get out there and remove the convertible top. No time until today when I had about 30 minutes to start poking around. I was also able to take a few more pics.
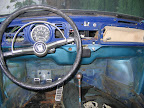
Here's the finished dashboard from Saturday:
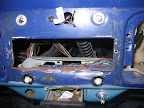
A closer look at what was under the knobs (still hoping I didn't break any of them)
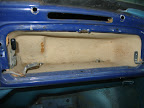
The glove compartment - it doesn't appear there is a decent way to remove the box itself. It's held in by a metal strap in the trunk. Note the handle above had to be removed before I could remove the entire dashboard.
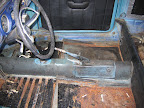
Another shot of the interior. Notice that I didn't finish removing the soundproof material on the passenger side. I'm pretty sure we're going to need to cut the whole piece out to weld in a new floor.
Another shot of the rusted floor.
And the battery compartment - you can see the concrete right below it.
Before I get back to the convertible top, here's a better picture of the seat lever you need to push to get the seats out.
So, the top... here's a shot of the back window (or what was the back window).
Where did she come from!!??
Here's the front header piece of the top. I did take the screws out, but there must be another step to start releasing the material from behind it. Since I was a bit stuck there...
I started taking out all these little screws from the side of the top. The screws are hidden beneath the rubber weather strip and I believe once they are all out I'll be able to start removing the material, at least from the sides. Unfortunately, the folding mechanism seems to be pretty rusted at the moment so the top won't open. It's not clear to me yet how much of it will be salvageable so I don't want to push to hard and break it if I can help it.
Unfortunately, that's about all I got done today.
Tuesday, April 1, 2008
Down to the metal
Saturday was the first serious work day on the bug. We got just about everything removed from the interior and it's almost down to the metal (or what's left of it). Since there has been a threat of rain and I haven't received my new car cover in the mail yet, I haven't attempted to remove the convertible top or the windows.
The biggest challenge was finding out how to get the front seats out. Neither of my manuals gave a good description, so a quick Google search got me on my way - it was actually crazy easy. Release the spring beneath each chair that connects it to the seat frame then just lift up on the front release knob (the one that moves the seat back and forth) and shove the chair all the way to the front until it is completely off of the seat frame. On both seats, I needed a rubber mallet to get the seat moving . The drivers seat came right out, but the passenger seat wouldn't budge. I found that there was a small release lever on the front door-side of the seat. When I pressed this down with a pencil, I was then able to easily move the chair. This was probably required on the drivers side but there was probably something already busted on the seat mechanism.
As we pulled off the rear panels, we definitely weren't expecting to find black plastic and duct tape. What in the world? I'll need to read up on this a bit more - I think the hole is supposed to be there and maybe they taped it up to keep the cold out?
We already knew there was rust, it was just a matter of how wide spread it had become. The area below the battery was rusted even when I was still driving the car, but once we pulled out the carpet and sound proofing... oh my... We pretty much can't step in the area behind the front seats without falling through, and the rear area... You can't really tell from this picture, but one wrong move and you are going to have rusted metal scraping your sides as you fall to the ground below.
The most time-intensive part of the job was probably removing the dashboard. Neither of my books did this any justice - they pretty much just showed where the various screw placements were. If I was to do this again, I would have started by removing the brace that holds the wiper motor. This was in the way the entire time until I removed it - it's only one bolt! The hardest parts were the 2 nuts holding the dash in the upper corners (from the trunk) and the 2 nuts holding the handle above the glove compartment.I was also really worried about getting the various knobs without breaking them. I couldn't find any information about how they came off. The cig. lighter unscrewed and the two top-middle knobs popped off easily. The cig. lighter itself pulled off but I'm not sure yet if I broke it or not. The lights and wiper knobs pulled off pretty easily as well.
During the job, I did my best to put screws/bolts/nuts in individual ziploc bags and label them as best as possible. I tried to take pictures of everything. For all wires, especially in the trunk, I used a labeler to label the wire (hopefully they stay on!).
The next step is finishing the teardown, especially the top, but I haven't decided what the next step after that will be. Repair/weld the sheetmetal? Examine the suspension and fix as necessary? Re-do the braking system and put new tires on? Take the engine out and start working on that?
Subscribe to:
Posts (Atom)